Spring Garden Clean-Up Checklist: Preparing For New Growth
After a long winter, spring offers gardeners the promise of renewal and fresh growth. The joys of spring gardening include seeing bulbs emerge and trees start to bud, signaling new life. To prepare for the bounty of spring and summer, it’s important to start the season off right with a thorough garden clean-up.
Spring garden clean-up involves more than just tidying up. It lays the groundwork for healthy plants and beautiful blooms in the months ahead. A proper clean-up removes debris and weeds that can harbor pests and diseases. It also gives you a chance to assess the garden’s overall condition after months of cold weather. Pruning away dead branches allows sunlight and air to circulate, creating the ideal environment for plants to thrive. Preparing soil, edging beds, and refreshing mulch are also key clean-up tasks.
Approaching spring garden clean-up systematically allows you to restore order and function. Your efforts will enable new growth to take hold and flourish. A rejuvenated garden is worth the effort and yields abundant rewards in beauty and produce. This spring clean-up checklist covers the essential tasks to unveil your garden’s full splendor.
Remove Dead Plants and Weeds
One of the first steps in spring garden clean-up is identifying and removing any dead plants, spent flowers, and weeds from the previous year. Taking out dead plant material prevents the spread of disease and pests to new growth. It also makes the garden look tidy and prevents weeds from going to seed and propagating (Source).
Carefully inspect each plant and look for any dead stems or foliage. Trim back any dead portions using bypass pruners or hand pruners (Source). Remove spent annuals and perennials by cutting or pulling them up by the roots. Take care not to disturb any emerging bulb foliage or early spring perennials.
Weeding is an important task as weeds compete with other plants for nutrients, light, and water. They can quickly take over a garden if left unchecked. Use a garden fork, hoe, or hand cultivator tool to remove weeds. Try to remove the entire root system so the weeds don’t regrow. Use mulch around plants to suppress future weed growth.
Prune Bushes, Trees and Shrubs
Proper pruning in the spring prepares your bushes, trees and shrubs for healthy new growth. Pruning encourages plants to grow fuller and prevents leggy growth. It’s best to prune spring-blooming shrubs like lilacs, azaleas, rhododendrons, and forsythia immediately after they finish flowering. Summer-blooming shrubs like hydrangea, spirea, and rose of Sharon should be pruned in early spring before growth starts.
When pruning bushes, trees, and shrubs, make sure to remove any dead, damaged or diseased branches first using sterilized pruning shears. Cut each branch at the base just above a leaf bud. Take out weak, thin shoots and rub branches at their bases to encourage fuller growth. For multi-stemmed bushes, remove the oldest third of the stems each year to rejuvenate growth. Prune trees to remove watersprouts and suckers. When finished, shape the plant and leave an attractive form.
Some of the most important spring-pruning includes:
- Flowering shrubs like lilacs – after flowering
- Evergreen shrubs like yew and juniper – in early spring before new growth emerges
- Large shrubs like forsythia and spirea – thin out older branches
- Ornamental trees like cherry and crabapple – shape and thin branching
Proper pruning encourages fuller, healthier growth on your bushes, trees and shrubs. Just be sure to prune at the right time for each plant to maximize flowering and avoid removing next year’s flower buds.
Test and Amend Soil
Spring is the ideal time to test your soil’s pH and nutrient levels before planting warm-weather crops like vegetables and annual flowers. You can purchase an inexpensive soil test kit and collect samples from different areas of your garden to get a full report. Send the samples to your local extension service for analysis.
The soil test results will indicate if you need to add any amendments to optimize conditions for plant growth. Acidic soil may need lime to raise the pH, while alkaline soil can be lowered with sulfur. Key nutrients like nitrogen, phosphorus and potassium can also be deficient and require fertilizer additions. Organic matter content can be increased by mixing in compost.
When amending soil, thoroughly mix in the recommended amounts several weeks before planting. Re-test the soil later in the season to see if further adjustments are necessary. With properly conditioned soil, your garden will thrive all season long.
Cut Back Ornamental Grasses
Ornamental grasses add beautiful texture and movement to the garden all season long. However, it’s important to cut them back in late winter or early spring before new growth emerges. This removes unsightly dead foliage and makes room for lush new growth.
The best time to cut back ornamental grasses is late winter or early spring, typically February or March. Wait until new green shoots are just barely starting to emerge from the base of the plant. Cutting too early can leave plants vulnerable to frost damage.
Use sharp pruning shears or grass shears to cut grasses back to within a few inches of the ground. Don’t be afraid to cut back hard – ornamental grasses respond well to close pruning. Cutting back by about 1/3 to 1/2 the total height is sufficient. Avoid cutting all the way down to the ground, as this can expose dormant buds to damage.
After cutting, remove old foliage around the base of the plant. A light application of nitrogen-rich fertilizer can help stimulate lush regrowth. With proper early spring cutting, ornamental grasses will return greener and fuller than ever.
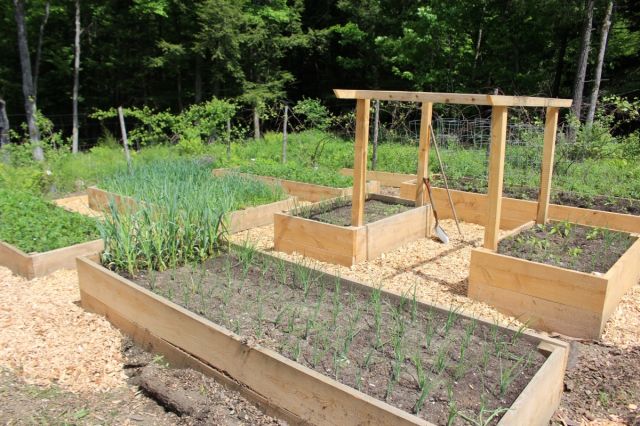
Clean up Flower and Vegetable Garden Beds
One of the most important spring garden preparation tasks is cleaning up the flower and vegetable beds. Start by removing any remaining mulch or dead plant material from last year. According to the Creative Vegetable Gardener, “One of the best ways to cut down on the time it takes to prepare your spring garden for planting is to keep it weed-free. And the best way to keep weeds at bay is to remove old mulch before it has a chance to break down into soil” (source). Pull any weeds that may have grown over the winter. Weeding early on prevents weeds from going to seed and creating bigger weed problems later.
After clearing out old plant debris and weeds, it’s time to prepare the soil. Add compost or other organic matter to flower and vegetable beds to improve nutrients and texture. According to Raised Beds: Preparing Your Garden Beds for Spring, “Prepare new beds for perennial flowers by spreading a 6-inch deep layer of organic matter (i.e. peat moss, compost, rotted manure) and work in thoroughly before planting” (source). Proper soil preparation now allows for better growth and blooms later on. Amend and turn over the top 4-6 inches of soil with a shovel or garden fork to get beds ready for new plantings.
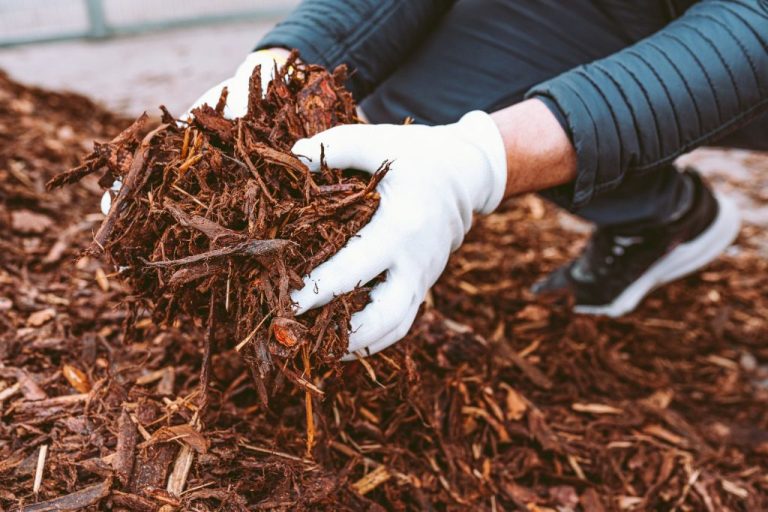
Refresh Mulch
Applying a fresh layer of mulch in your garden beds each spring has many benefits. Mulch helps retain moisture in the soil so you don’t have to water as frequently (Three Seasons LLC). It also suppresses weeds, keeping your garden looking tidy and preventing unwanted plants from competing with your landscaping. Additionally, as the mulch breaks down it improves soil nutrition.
The best time to refresh your mulch is in early spring after the ground has thawed. Apply 2-3 inches of mulch across all of your garden beds. Make sure not to pile mulch directly against the bases of plants or trees (Gardening Know How). Good mulch choices include shredded bark, wood chips, compost, leaves, straw or pine needles. Avoid using inorganic mulches like rocks or rubber which don’t enrich the soil.
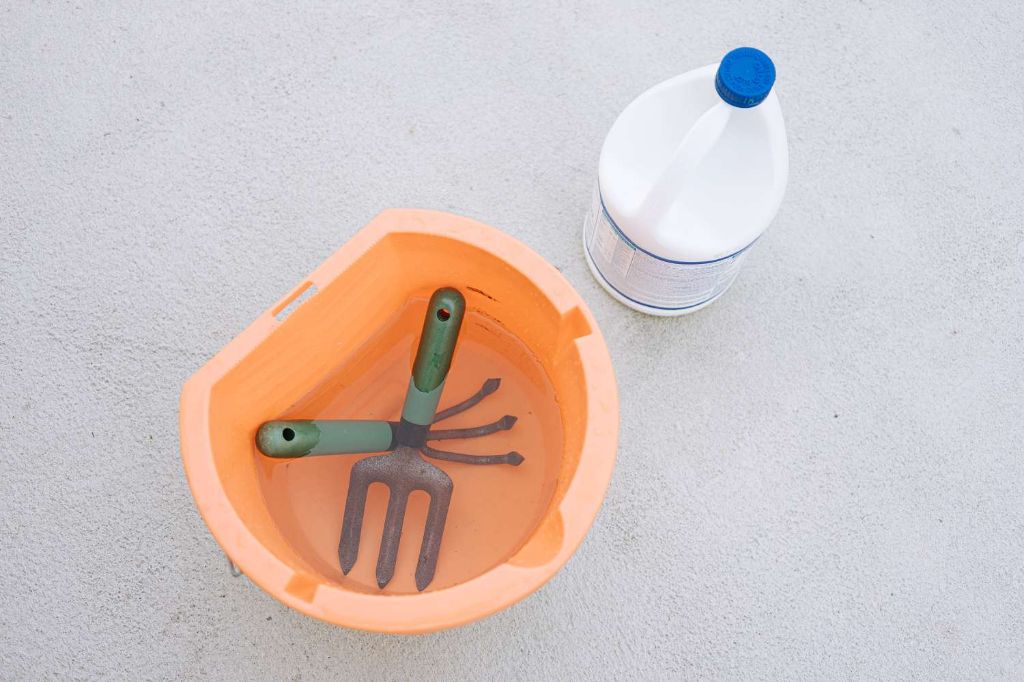
Clean Garden Tools
As the weather warms up, it’s important to thoroughly clean your garden tools before using them for spring gardening. Proper tool maintenance helps remove debris, disinfects, and prolongs the life of your equipment. Focus cleaning efforts on frequently used tools like pruning shears, shovels, and hoses.
Start by using a soft brush or cloth to wipe away loose dirt and mud from tool surfaces and blades. For stubborn debris, upgrade to a stiff bristle brush or steel wool. You can also try soaking tools in a bucket of warm water mixed with a small amount of dish soap – allowing the grime to soften before scrubbing. Be sure to fully open and clean the joint area on pruning shears to remove plant matter buildup.
For optimal disinfecting, create a cleaning solution by combining 1 part bleach to 9 parts water. Fully submerge tools for 10 minutes before rinsing and drying. This helps kill bacteria or fungal spores that could transfer to healthy plants. Alternatively, you can wipe down tools with disinfecting wipes containing chlorine bleach.[1]
Finally, inspect each tool for rust spots or damage that needs repair before storing away. Proper maintenance now means your gardening tools will be ready to use when it’s time for spring planting and pruning.
[1] https://www.extension.iastate.edu/news/yard-and-garden-prepare-your-garden-tools-spring
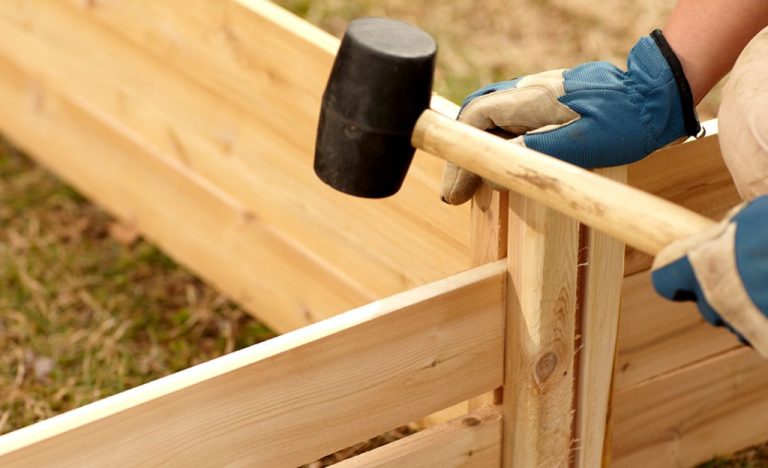
Check for Damage
Once the clutter and debris have been cleared, it’s important to do a thorough inspection of fences, structures, and irrigation systems to check for any damage that occurred over the winter. Freezing temperatures and heavy snow or ice can wreak havoc on wood and metal garden structures. Make sure to look for loose nails, cracked or rotting wood, peeling paint, and rust spots. Check that fence posts are still securely in the ground. Examine any trellises, arbors, pergolas and sheds for damage. Look at irrigation equipment and supply lines for breaks, leaks or malfunctions. Drip irrigation tubing that is above ground may need to be replaced if it became brittle over the winter.
Make a list of any issues found and repairs that need to be made. It’s best to fix damages as soon as possible to prevent further deterioration. For wood structures, sand and repaint any problem areas to protect the wood and make them last longer. Use caulk or wood putty to patch small holes. Replace any broken or rotten boards. Tighten any loose screws or nails. For rusty metal, scrub the rust off and repaint. Splint or replace damaged posts or railings. Fix leaks in irrigation lines and ensure control systems are working properly before the growing season gets underway. Making repairs now means your garden structures and equipment will be ready for another year of growth and enjoyment.
Plan New Gardens and Additions
After cleaning up your existing gardens, it’s a great time to start planning any new garden beds, hardscapes, or water features you hope to install in the spring. Carefully look over your yard and decide where you want to add new garden spaces. Consider the sunlight, drainage, and existing plants in the area. Sketch out designs for new gardens on paper, marking shapes and sizes. Opt for geometric square or rectangular beds if you plan to grow vegetables, or create free-flowing curved beds for perennial flowers. Determine how much space you need for the plants you want to grow. Research your options for materials like bricks, stones, or timbers to edge new beds.
Think about adding decorative touches like trellises, arches, stepping stones, or benches to your garden. Plan for any patios, pathways, or water features like fountains. Making a detailed map now allows you to gather materials and prepare the space. Once spring arrives, you’ll be ready to start digging and bringing your plans to life. Starting the design process in winter gives you the longest amount of time to collect ideas and make thoughtful choices.