Vermicomposting: Turning Kitchen Scraps Into Nutrient-Rich Soil For Your Edibles
Vermicomposting is the process of using worms and microorganisms to turn organic waste into a nutrient-rich soil amendment known as vermicompost or worm castings (source). Worms and microbes work together to break down materials like food scraps, paper, cardboard, and yard waste into an incredibly beneficial substance for your plants and garden soil.
Vermicompost provides a number of advantages over traditional composting. The worm castings contain higher levels of nutrients, plant growth hormones, beneficial microbes, and are a more homogenous product (source). The worm castings also have a lower carbon to nitrogen ratio and neutral pH ideal for plant growth.
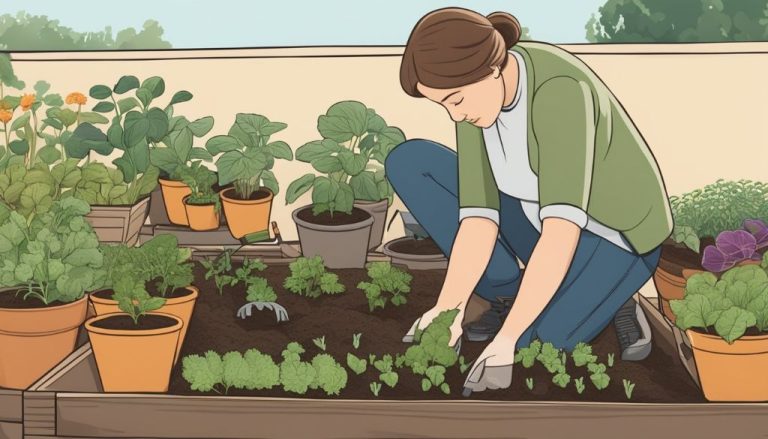
The vermicomposting process starts with setting up a bin with bedding for the worms. Food scraps and other organic materials are added in layers which the worms digest and convert into castings. Maintaining proper moisture and temperature will keep the worms happy. After several months, the rich vermicompost can be harvested and used to boost soil health and plant growth.
Choosing a Vermicomposting System
There are several types of vermicomposting systems to choose from, including indoor and outdoor options. The main types of vermicomposting systems are:
- Bins – Plastic storage bins or wooden boxes work well for indoor vermicomposting. They contain drainage and allow air flow while keeping pests out.https://extension.okstate.edu/fact-sheets/the-basics-of-vermicomposting.html
- Beds – Outdoor vermicomposting beds made of wood, concrete blocks or straw bales. These allow for large-scale composting. Beds need to be kept moist and protected from extremes of heat and cold.https://www.ecofarmingdaily.com/build-soil/soil-inputs/compost/vermiculture-systems/
- Windrows – Elongated piles of organic waste placed over a worm bed. This is used for very large, commercial-scale vermicomposting operations.
When choosing a vermicomposting system, consider factors like:
- Available space – Indoor or outdoor system?
- Desired capacity – How much waste needs to be composted?
- Climate conditions – Will the system be exposed to temperature extremes?
- Costs – DIY or purchased system? Operating costs?
- Time commitment – Large-scale systems require more maintenance.
Selecting the right vermicomposting system for your needs and environment will lead to successful worm composting.
Setting Up Your Vermicomposting Bin
When setting up your vermicomposting bin, the first consideration is size. The bin should be shallow, with a large surface area. Common sizes are around 12-16 inches deep and at least 18″ x 24″ wide. The bin can be made from plastic, wood, or other materials, but allow for drainage holes and good ventilation to avoid soggy conditions.1
For bedding, use materials like shredded cardboard, paper, straw, peat moss, or coconut coir. Aim for 6-8 inches of loose bedding to give the worms room to move around. Keep the bedding moist but not saturated – like a wrung-out sponge. Too much moisture causes anaerobic conditions and smelly decay. The bedding should feel moist but not release water when squeezed. 2 Fluffing the bedding weekly provides aeration. Remove any uneaten food or moldy spots as part of your routine maintenance.
Selecting the Right Worms
When it comes to vermicomposting, the best worms to use are red wigglers (Eisenia fetida or Lumbricus rubellus). Red wigglers are recommended over other worm species because they:
- Thrive in the environment of a compost bin
- Can consume large amounts of organic material
- Tolerate handling well
Species like earthworms or nightcrawlers prefer living and tunneling down into soil and may try to escape from a compost bin. Red wigglers are content living in the food scraps and surface of the bin.1
For starting a home vermicomposting system, aim for around 1 pound or 1,000 red wigglers. This provides a healthy worm population to get decomposition going. Red wigglers are prolific breeders, so the population will multiply over time as conditions allow.2 You can buy composting worm mixes online or at some garden stores.
Feeding and Maintaining Your Worm Bin
Keeping your worms fed and happy is essential for a healthy vermicomposting system. Here are some tips on worm food and maintaining the right environment in your bin:
Worms can eat most forms of organic matter including fruit and vegetable scraps, coffee grounds and filters, crushed eggshells, soaked tea bags and leaves, shredded newspaper and cardboard. Avoid feeding them spicy, salty, oily or dairy foods as these can be harmful.1
Aim to feed your worms new material a few times per week, roughly the equivalent of what fits in the palm of your hand each time. Overfeeding can cause odors and overly acidic conditions. Underfeeding means your worms could starve and start to die off.
Check that moisture levels in the bin are similar to a wrung-out sponge. The bedding should not be soggy or bone dry. Add a light misting of water if it appears too dry. Too much moisture encourages mold growth.2
Ideal temperatures for worm composting systems range from 55-75°F. Monitor conditions with a compost thermometer and move the bin to a warmer or cooler spot as needed. Extreme temperatures above 84°F or below 32°F can harm or kill worms.
Turning and fluffing the bedding weekly helps aerate the bin and redistribute moisture and nutrients. Remove any obvious moldy or stinky spots.
By carefully managing food, moisture and temperature levels, you can maintain a healthy worm colony and efficient compost production.
Troubleshooting Common Issues
Even the best maintained vermicomposting bins can run into problems occasionally. Here are some common issues and how to resolve them:
Odors
A properly managed worm bin should have an earthy, musty smell. Strong foul odors are a sign of overfeeding or too much moisture (https://www.unclejimswormfarm.com/worm-composting-bin-troubleshooting-guide/). Try cutting back on feeding, mixing in dry bedding like shredded paper or leaves, and mixing up the bin contents to increase airflow. Leaving the lid ajar for a few hours can also help dissipate odors.
Mold Growth
Small amounts of white or gray mold are normal, but large patches of fuzzy mold indicate excess moisture. Mix the bin contents to dry them out, add more dry bedding, and leave the lid ajar to increase ventilation (https://mindfulwaste.org/vermicomposting-troubleshooting-guide/). Mold growth can usually be corrected by creating drier conditions.
Pesky Insects
Fruit flies and fungus gnats are common pests. Reduce feeding amounts, mix in dry bedding, and make sure food scraps are buried well. Traps made with apple cider vinegar can also help manage populations. If small black bugs appear, they are likely harmless springtails that help break down organic matter.
Escaping Worms
Worms may try to escape if conditions become inhospitable. Make sure the bin is not overcrowded, too wet, too acidic, or lacking oxygen. Check that drainage holes are not blocked. Adding more bedding can also help make the bin more inviting. Make sure the bin is not exposed to light or extreme temperatures.
Harvesting Vermicompost
Vermicompost is ready to be harvested when the bin contents are dark, crumbly, and earthy-smelling. This usually takes 3-6 months after initial bin setup. There are a few techniques for separating the worms from the finished vermicompost:
Move Bedding Method: Stop feeding one side of the bin for 1-2 weeks. The worms will migrate to the side with food. Scoop out the vacated side and harvest the vermicompost.
Screening: Pass bin contents through a 1/4-1/2 inch mesh screen. Worms and unfinished compost stay atop the screen while vermicompost falls through. Rinse worms and return them to the bin.
Cone Method: Make harvested bin contents into a cone shape. Shine a light on the cone; worms will burrow down away from light while finished castings remain on top.
Before use, finished vermicompost should be cured/dried for 1-2 weeks. Spread in thin layers and keep covered to retain nutrients. Cured vermicompost can be stored in breathable containers for up to 6 months.
Uses for Vermicompost
Vermicompost has many beneficial uses in gardening and landscaping. Here are some of the top ways to utilize this nutritious organic matter:
In gardens and flower beds – Mixing some vermicompost into the top few inches of soil when planting vegetables, herbs, fruits, and flowers gives them a boost of nutrients and improves moisture retention. Vermicompost is gentle enough to be worked into the soil right along delicate plant roots. Regular light top dressings of vermicompost during the growing season continues to feed plants without risk of burning. For starting seeds or transplanting seedlings, vermicompost can be blended into potting mixes at a rate of 10-20% to further enrich the soil and promote healthy root growth (https://www.finegardening.com/article/how-to-use-vermicompost-on-your-plants).
In lawns and turf – Vermicompost makes an excellent natural fertilizer for lawns when applied in thin layers atop the grass. The nutrients soak down into the soil and feed the grass roots. It also improves moisture retention so lawns stay greener. Vermicompost brings beneficial microbes into the soil that keep grass healthy. It can be applied any time during the growing season.
For houseplants and container gardens – Blending some vermicompost into potting soil provides nutrients and enhances drainage. Top dressings of vermicompost on houseplants give them a steady supply of nutrients. The microbial activity helps prevent diseases in container plants. Vermicompost improves moisture retention for houseplants yet maintains the porosity needed to prevent soggy soil.
For overall soil health and plant growth – The nutrients, microbes, and porous structure of vermicompost enhance any type of soil and provide benefits for plant growth (https://pubmed.ncbi.nlm.nih.gov/25130895/). It increases the fertility, biological activity, and tilth of all types of soils from clays to sands. Whether used in gardens, lawns, or containers, vermicompost boosts soil health and plant performance without the risks of chemical fertilizers.
Vermicomposting Tips and Tricks
Here are some helpful tips and tricks for getting the most out of your vermicomposting setup:
Maximize worm productivity by keeping your bin in a location with temperatures between 55-77°F. Red wigglers, a popular composting worm, thrive in these moderate temperatures (https://extension.usu.edu/yardandgarden/research/vermicomposting). You can move your bin around seasonally to help maintain ideal temperatures.
Save time by lining your bin with landscape fabric or mesh to prevent worms from escaping into the surrounding soil while still allowing for aeration and drainage. Plastic bins with lids also help contain worms and prevent fruit flies.
Customize your vermicomposting system by experimenting with multi-level or layered bins. This provides the worms with vertical migration options to find their preferred temperature and moisture levels. Just make sure to include ramps or ladders between levels.
Reduce fruit fly problems by freezing food scraps before adding them to your bin. Allowing scraps to thaw over a couple days in the bin gives worms time to consume the food before it gets too smelly or slimy.
Improve aeration by turning over the bedding weekly and burying new food scraps in a different part of the bin each time. Maintain 2-3 inches of bedding over newly added food.
Getting Started with Vermicomposting
Vermicomposting is an easy way to compost at home using red wiggler worms to break down food scraps. Before getting started, assess your readiness and commitment. Vermicomposting requires regular maintenance to keep your worms happy. Make sure you can commit 10-15 minutes per week on feeding and monitoring [1].
For beginners, choose an indoor plastic bin or wooden pallet system [2]. These bins are easy to set up and maintain. Red wigglers are recommended for beginners as they are hardy worms that thrive indoors.
Read vermicomposting guides and watch tutorial videos to learn proper techniques before starting your bin. Join vermicomposting communities online to connect with experienced vermicomposters who can provide tips and advice.