Diy Vertical Garden: Maximizing Space In Small Areas
A vertical garden is a creative way to maximize limited garden space by growing plants up vertical structures like walls, trellises, fences, balconies, and more. Vertical gardening makes use of unused vertical space to provide more area for planting without taking up valuable floor space (Epigardening.com, 2023). This allows gardeners with small yards, patios, balconies, or even just windowsills to grow a bountiful harvest.
The main benefits of vertical gardening in small spaces include:
- More planting area and higher yields in a compact footprint
- Makes use of overlooked vertical space on walls, fences, etc.
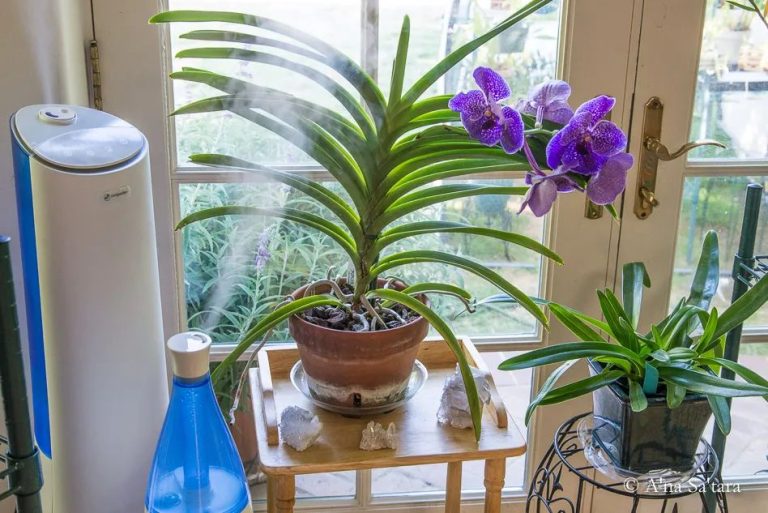
- Provides attractive greenery and purifies air even in urban settings
- Allows easy access and maintenance of plants at waist height
- Maximizes sunlight exposure for plants
Vertical gardens are an excellent solution for city dwellers and anyone with limited horizontal space to still enjoy gardening and growing fresh produce. This article will explore how to plan and install a DIY vertical garden to maximize your small space.
Planning Your Vertical Garden
When planning your DIY vertical garden, there are a few key considerations to factor in for optimal growth and enjoyment:
Sunlight: Determine how much direct sunlight your vertical garden will receive. Most edible plants require at least 6 hours of direct sun per day. For areas with less light, choose shade-tolerant plants. Consider sunlight at different times of day and adjust plant placement accordingly.
Irrigation: A vertical garden needs consistent watering. Decide on an irrigation method like drip irrigation or hydroponics before installing. Group plants with similar watering needs together. Install an automatic irrigation system for low maintenance.
Plant Selection: Choose the right plants for your light conditions. Favor vertically growing, trailing plants. Herbs, leafy greens, strawberries, and ornamental flowers work well. Avoid large vegetables that need trellising. Select a mix of plants with different growth rates and water needs.
Structures and Frameworks
When building a vertical garden, the first step is choosing a structure or framework to support the plants. The structure you choose depends on the space you have available and your style preferences.
One popular option is attaching planters directly to a wall or fence. You can use shelves, racks, or slatted wood to hold containers in place on the vertical surface. Make sure to properly anchor the structure to studs so it can support the weight (Source 1).

Freestanding vertical gardens are another choice. You can use stacked crates, ladders, poles, or PVC pipe structures to create vertically oriented planting beds. Place them against a sunny wall for support. Add containers or growing pockets at different heights for easy access (Source 2).
Hanging structures like vertical columns or wall-mounted racks offer a space-saving option. Use chain, rope, or cables to suspend the planting containers. Make sure to hang them securely and evaluate weight limits before adding soil and plants.
No matter which vertical garden structure you choose, make sure it is sturdy, made of weather-resistant material, and suitable for the space you want to fill.
Plant Selection
Selecting the right plants is critical for a successful vertical garden. The plants need to thrive in the unique vertical environment. Some great options include leafy greens like spinach and lettuce, herbs like thyme and oregano, trailing plants like creeping Jenny, and edible flowers like nasturtiums.
Leafy greens like spinach and lettuce are perfect for vertical gardens because they grow well in limited space and shallow soil. Spinach in particular is a cool weather plant that does great in vertical gardens (Source). Lettuce can also be succession planted for continuous harvest.
Herbs like thyme, oregano, sage, and chives are compact, don’t require much soil depth, and can cascade nicely in a vertical garden (Source). They provide a continuous harvest over time when trimmed.
Trailing plants like creeping Jenny are perfect choices as they naturally cascade over the edges of the vertical garden. Their trailing nature maximizes the vertical space.
Edible flowers like nasturtiums and violas add color while also being edible. They can create a beautiful cascading effect down a vertical garden.
Growing Media
An important decision in creating your DIY vertical garden is choosing the right growing media to support your plants. There are a few main options:
Soil-based media is the most familiar option and consists of a blend of organic matter like compost mixed with soil and aggregates like perlite or vermiculite to improve drainage and aeration (Source). Soil provides nutrients for plants and retains moisture well. However, it can be heavy in vertical gardens.
Hydroponics involves growing plants without soil by delivering nutrient-rich water. Plants are supported in inert media like clay pebbles, perlite or coco coir. Hydroponics allows maximum control over plant nutrition but requires more equipment (Source).
Other lightweight soilless media like coco coir, rockwool or perlite blended with compost can provide a happy medium. These drain well but retain some moisture and nutrients for plants (Source).
Irrigation and Watering
Proper irrigation is vital for the health and growth of plants in a vertical garden. Many vertical gardens utilize drip irrigation systems with an automatic timer to efficiently deliver water and nutrients to the roots. Drip irrigation applies water directly to the soil at a slow, steady rate using a network of tubes with emission points along their length.
According to DIY Vertical Garden with Drip Watering System, a 1/2″ drip irrigation system is commonly used for DIY vertical gardens. The tubing can be run vertically along one side of the vertical garden frame with emitters spaced out along the length. Using an automatic timer allows the system to be set to a consistent watering schedule without having to manually turn it on and off.
For larger vertical garden installations, Drip Irrigating for Verticals Gardens and Living Walls recommends running 1⁄2” or larger tubing across the top with vertical lines dropping down. This distributes water evenly across the entire vertical surface. The irrigation frequency depends on factors like plant types, climate, and growing medium but is often set for multiple short waterings per day.
Drip irrigation delivers a targeted amount of water right to the roots using minimal water compared to sprinklers or hand watering. Utilizing a properly designed drip system with timer allows vertical garden plants to thrive with minimal maintenance.
Fertilization
Vertical gardens have unique nutrient requirements due to their limited soil volume and vertical orientation. Using the right fertilizers and application methods helps ensure plants thrive.
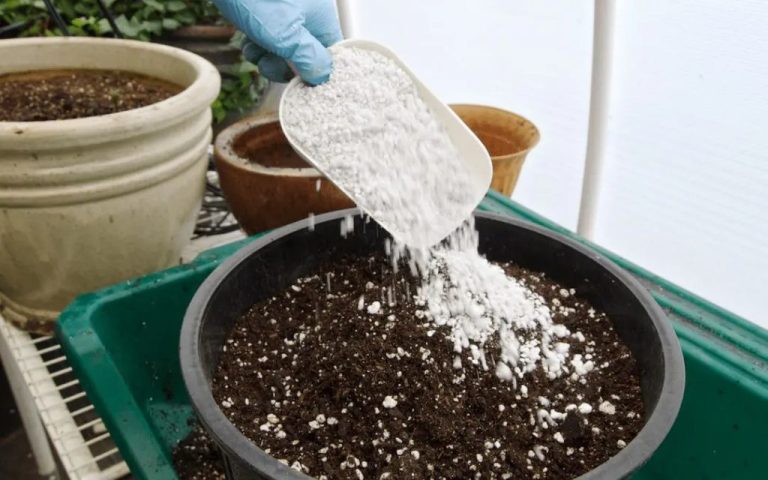
Most vertical gardens need regular fertilization to replace nutrients that leech from the soil over time. Water-soluble fertilizers are preferred as they can fully dissolve and penetrate the media (cite: https://www.verticalgardensupply.com/blog/how-to-add-fertilizer-to-soil/). Applying 1⁄4- to 1⁄2-strength balanced fertilizer every 2 weeks during the growing season provides a steady nutrient supply.
Avoid over-fertilizing, which can burn roots or leaves in confined vertical spaces. Carefully follow label instructions for any fertilizer product used.
Organic options like compost teas, fish emulsions, and seaweed extracts offer more gentle nourishment. They break down slowly to provide nutrients over time (cite: https://getbusygardening.com/vertical-garden-maintenance/).
Group plants with similar fertilizer needs together in vertical gardens whenever possible. For example, heavy feeders like tomatoes, fruits, and flowers appreciate more frequent doses than lower-maintenance succulents or herbs.
Monitor plants and adjust fertilizer frequency and type as needed for optimal growth.
Maintenance
Proper maintenance is key to keeping your vertical garden looking good and the plants healthy. Here are some tips on maintenance:
Pruning
Pruning the plants in a vertical garden is important to promote bushy, compact growth and allow light to reach all areas. It’s generally recommended to prune plants in a vertical garden 1-2 times per year. Use clean, sharp pruners to trim plants just above leaf nodes or buds. Remove any dead or diseased foliage as well (Source).
Cleaning
Dirt and debris can accumulate on vertical garden structures over time. Periodically clean panels and surfaces using a gentle cleanser and soft cloth. Check for and remove any weeds or unsightly growth (Source).
Pest Control
Monitor for pests like aphids, spider mites or mealybugs. Treat with organic insecticidal soaps or neem oil sprays. Avoid over-fertilizing, which can make plants more susceptible to pests.
Maximizing Vertical Space
One of the biggest benefits of vertical gardens is their ability to maximize limited ground space. By stacking plants vertically, you can grow a lot more in a small footprint. There are several techniques to effectively utilize vertical space:
- Tiered planting – Shelving plants on multiple stacked levels or terraces. This allows you to use vertical space efficiently by planting at different heights.
- Cascading plants – Using vines or trailing plants that cascade down over the edges of the garden. Letting plants hang down creates a full, lush look that takes advantage of vertical real estate.
- Varying plant heights – Incorporating a mix of tall, medium, and short plants. Combining different heights creates visual interest and density.
- Optimizing sun exposure – Positioning plants to maximize sun exposure at different levels. Sun-loving plants can go at the top, while shade tolerant ones are lower.
- Creative trellising – Using trellises, nets, strings or other structures for climbing vines and trailing plants. This adds support and upward growing space.
With some creative planting techniques, you can grow a lush, dense vertical garden even in a narrow footprint. The key is to think vertically and find ways to stack, tier, and trellis plants to get the most out of every square inch.
Enjoying the Benefits
Vertical gardens offer numerous rewards for those willing to put in the effort to create and maintain them. Some of the key benefits include:
Improved air quality – Plants help filter dust and pollutants from the air, leaving you with cleaner, fresher air to breathe (https://www.planetnatural.com/10-benefits-of-vertical-gardening/). This can be especially impactful in urban environments.
Increased accessibility – Vertical gardens allow those with mobility issues or physical disabilities to more easily tend to plants without excessive bending or reaching (https://4naturesystem.com/en/blog/bid-169-6-economic-benefits-of-vertical-gardens). They bring gardening to eye level.
Insulation and temperature regulation – Strategically placed vertical gardens can help insulate your home or building, reducing energy costs for heating and cooling. The plants and soil help moderate temperatures.
Aesthetic appeal – Vertical gardens simply look cool. They add beauty and visual interest to both outdoor and indoor spaces. You can get creative with shapes, materials, plants and designs.
Increased relaxation – Interacting with plants, soil and nature inherently brings stress relief and relaxation. Vertical gardens provide an oasis, even in urban settings.
The rewards of vertical gardening are multifaceted. With some planning and effort, you can reap cleaner air, accessibility, insulation, beauty, and tranquility with a thoughtfully constructed vertical garden.