Tips For Growing Edible Mushrooms At Home
Growing edible mushrooms at home is becoming an increasingly popular hobby as more people seek out fresh, local foods. With the global mushroom market size expected to reach $83.55 billion by 2026 [1], growing mushrooms yourself can yield tasty, nutritious results while saving money. The top three most cultivated mushroom varieties – button, oyster, and shiitake mushrooms – are all relatively easy to grow at home with minimal equipment.
Home mushroom growing has many benefits beyond enjoying fresh mushrooms. Mushrooms are packed with nutrients like B vitamins, selenium, potassium, copper and fiber. Growing your own allows you to control growing conditions and avoid pesticides or other chemicals used in commercial mushroom production. Additionally, since mushrooms have a short shelf life, home growing lets you enjoy peak flavor and maximize nutrients in your harvest. Finally, it’s fun and rewarding to cultivate your own food from start to finish.
The three most popular types of mushrooms for home growing are:
– Button mushrooms – Common white mushrooms, easily grown on composted manure.
– Oyster mushrooms – Delicate flavor, grow quickly on straw or coffee grounds.
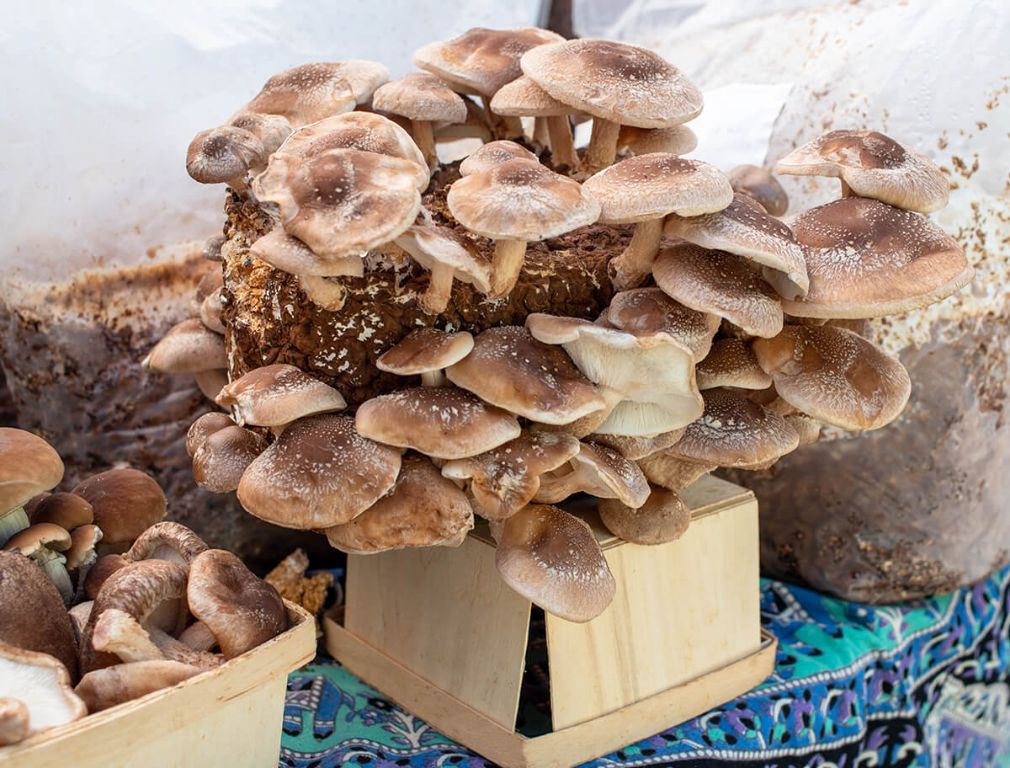
– Shiitake mushrooms – Hearty, meaty mushroom that grows on logs or sawdust.
With a bit of preparation and the right growing medium, you can have a satisfying mushroom harvest within a couple of months.
Choose Your Mushroom Variety
When getting started growing mushrooms at home, it’s best to start with varieties that are known to be easier for beginners. Some of the most popular and easiest mushroom varieties for beginners include:
- Oyster mushrooms – Known for their ease of growth and high yields, oyster mushrooms are a great choice for beginners. They grow well on straw or coffee grounds.
- Shiitake mushrooms – Shiitake can be grown indoors or outdoors on logs, making them a versatile choice. They have a desirable umami flavor. Shiitake are easy to grow and marketable.
- Lion’s mane – Distinctive shaggy appearance and purported health benefits make lion’s mane fun to grow. They fruit reliably on sawdust or straw.
Common white button, cremini, and portobello mushrooms are all actually the same species, simply harvested at different stages. Button mushrooms have small unopened caps, while mature portobellos have large open caps and oxidized brown coloring.
Oyster, shiitake, and lion’s mane mushrooms have different colors, shapes, growth habits, and nutritional profiles that make them interesting varieties to try growing.
Obtain Mushroom Spawn or Spores
Mushroom spawn contains the mycelium or vegetative part of a fungus that will later produce mushrooms. Spores are reproductive cells that contain the DNA of a mushroom and must spread and mate to produce mycelium. While both can be used to grow mushrooms at home, mushroom spawn provides a quicker and more reliable start to the growth process. According to Northspore, “Mushroom spores require extra steps, perfect conditions and plenty of patience to form mushroom mycelium” whereas mushroom spawn skips this stage and is ready to grow.
Most edible mushrooms like oyster, shiitake and lion’s mane are best grown from mushroom spawn. Spawn can be purchased online from suppliers like North Spore (https://northspore.com/blogs/the-black-trumpet/mushroom-spores-mushroom-spawn-what-is-the-difference) or Fungi Perfecti (https://www.funguygrowsupply.com/the-black-truffle/mushroom-spores-vs-spawn-unveiling-the-difference/). Spawn typically comes in sawdust, grain, or wood chip form. The growing medium like straw or wood chips must match the form of spawn selected.
For gourmet mushrooms that cannot be cultivated from spawn, spores may be the only option. It’s important to purchase spores only for legal mushroom species in your area. Reputable online vendors sell spores for research purposes only.
Prepare the Growing Medium
The growing medium provides nutrients and a habitat for mushroom spawn to colonize and fruit. Selecting the right medium for your mushroom variety is essential. Common mushroom growing mediums include:
- Straw – Typically used for oyster mushrooms. Soak and pasteurize straw by submerging in 160-180°F water for 1-2 hours.
- Woodchips – Good for oyster and shiitake mushrooms. Pasteurize woodchips by soaking in 160°F water overnight.
- Sawdust – Often used for shiitake and lion’s mane mushrooms. Sterilize sawdust in a pressure cooker for 45-90 minutes.
- Logs – Works well for shiitake and oyster mushrooms. Submerge logs in 160°F water for 24 hours to pasteurize.
Pasteurization kills most contaminants by sustained heat over time, while sterilization kills all microorganisms with high heat and pressure. For beginners, opt for a sterilized sawdust block or pasteurized straw to reduce risks of contamination.
Inoculate the Medium
Once your growing medium is prepared, the next step is to inoculate it with mushroom spawn or spores to introduce the mycelium. This allows the mushroom mycelium to colonize the substrate and grow. There are a few key steps to proper inoculation:
First, you need to evenly distribute or inject the mushroom spawn throughout the growing medium. For bags or jars, inject the spawn into holes spaced a few inches apart. For trays or beds, mix the spawn in thoroughly to inoculate the entire medium. Distributing the spawn evenly allows for quick, uniform colonization.
Proper temperature during inoculation is also important. Most mushrooms grow best between 70-80°F during colonization. Temperatures much higher or lower will slow or prevent growth. Maintain a stable, ideal temperature as the mycelium starts spreading through the medium.
Finally, give the mycelium time to fully colonize the substrate before fruiting. This colonization period, where the mycelium is growing and networking, can take anywhere from 10 days to several weeks depending on factors like temperature, spawn type, and substrate. Wait until the mycelium has visibly spread throughout most of the medium before initiating fruiting conditions.
Initiate Fruiting Conditions
To initiate mushroom fruiting, you first need to expose the fully colonized substrate or block to light, decrease the carbon dioxide levels, and make changes to temperature and humidity. Exposure to light, especially blue light, signals to the mycelium that it has reached the surface and can start forming mushrooms 1. Reducing carbon dioxide buildup, by improving air exchange, is another environmental trigger. For many mushroom varieties, slightly lowering the humidity from near 100% to around 90-95% and lowering the temperature by a few degrees will prompt the start of fruiting 2.
Once pins or primordia start to form, maintain proper surface humidity and sufficient fresh air exchange for the mushroom heads to grow and mature. Creating the ideal microclimate on the surface of the substrate encourages full mushroom development. Fanning the block and misting it with water 2-3 times per day will provide the moisture and airflow needed. The proper fruiting room environment varies by species, but generally you want moderately high humidity, steady air circulation, stable temperatures between 65-75°F, and consistent (but not direct/intense) light.
Maintain Proper Fruiting Conditions
Once your substrate is fully colonized by mycelium, it’s time to initiate fruiting conditions. This stimulates the mycelium to form mushrooms. Proper fruiting conditions are critical for a bountiful harvest.
Ideal fruiting conditions include:
- Temperature between 70-80°F. Different strains prefer slightly different temperatures, so follow recommendations for your variety. [1]
- High humidity around 85-95%. Moisture is needed to form mushrooms. Use a humidifier or hand misting to maintain humidity. [2]
- Plentiful fresh air exchange to provide oxygen and prevent CO2 buildup. Fan or mist several times per day.
- Moderate light, about 12 hours per day. Ambient daylight or artificial light works.
A daily schedule of misting the substrate and fanning fresh air will help dial in perfect fruiting conditions. Be observant and adjust as needed to optimize your mushroom yield.
Harvest Mushrooms
Identifying the ideal time to harvest your mushrooms is crucial for getting the best yield and flavor. Generally, mushrooms are ready to pick right before or just as the veil underneath the cap tears away from the stem. At this stage the caps have fully expanded. Wait too long past the tearing of the veil and the mushrooms will stop growing, start to rot, and release spores.
There are a few techniques for harvesting mushrooms to preserve their freshness:
– Cutting: Using a sharp knife, cut the mushroom stem close to the substrate surface. Try to leave some stem behind to allow for additional flushes of mushrooms in that spot.
– Twisting: Grasp the mushroom at the base and gently twist to detach it from the substrate. Avoid pulling too hard, which can disturb the mycelium.
– Pulling: For mushrooms with a more bulbous base, you can cleanly pull straight up to remove them.
After harvesting, use or store the mushrooms right away. Place them loosely in paper bags or wrap in paper towels, then refrigerate. Properly harvested mushrooms can last 7-10 days refrigerated.
Additional Flushes and Re-fruiting
After harvesting your first flush of mushrooms, it’s possible to get additional flushes from the same growing medium. To trigger new mushroom growth, the substrate needs to be rehydrated after picking the initial mushrooms. The easiest method is to soak the entire substrate in water for 12-24 hours after harvest (https://www.zamnesia.com/blog-harvest-multiple-flushes-magic-mushroom-grow-kit-n2113). This allows the medium to reabsorb moisture. Remove any unpicked mushrooms or aborted pins first.
Proper air exchange during the rehydration phase is also critical for promoting additional flushes. Make sure the substrate is exposed to fresh air while soaking and fruiting again. Open any bags or containers daily to maintain proper humidity and oxygen levels (https://www.drpaddo.com/en/blogs/news/how-do-you-get-multiple-flushes-from-a-magic-mushr/).
Typically, the first flush produces the largest and best quality mushrooms. Each subsequent flush will generate smaller yields. Expect around 2-4 potential flushes, but the number can vary based on genetics and growing conditions. With each flush, the mycelium network weakens and has less energy to create new fruiting bodies. Eventually, the substrate will be exhausted.
Troubleshooting Common Issues
Growing mushrooms at home can be rewarding, but you may encounter some common issues along the way. Here are some troubleshooting tips for the three most frequent problems:
Contamination
Contamination from mold, bacteria, or other microorganisms is one of the top reasons mushroom growth may fail. Signs include discolored or fuzzy spots, foul odors, and failure of mycelium to fully colonize the substrate. To prevent contamination, follow sterile procedures and avoid opening containers after inoculation. Discard any contaminated blocks or jars and sterilize the growing area before starting again (Source).
Small Mushrooms
If your mushrooms come out unusually small and underdeveloped, it usually indicates growing conditions were not ideal. The most common causes are insufficient fresh air exchange, overhydration, and temperatures outside the ideal range. Target the proper temperature and humidity levels, fan and mist moderately, and avoid saturating the substrate (Source).
No Fruiting
If the mycelium colonizes fully but fails to fruit into mushrooms, it needs an environmental trigger. For many species, this involves exposing the mycelium to fresh air, light, and cooler temperatures to initiate the fruiting stage. Create these conditions by removing any coverings, fanning, lowering temps slightly, and providing 12 hours of light per day.