Diy Plant Propagation: Growing New Plants From Cuttings
Plant propagation is the process of creating new plants from an existing plant. There are many different propagation techniques, but taking cuttings is one of the easiest methods for home gardeners. Plant propagation involves taking a piece of a parent plant and helping it form its own roots to grow into a separate, independent plant. This allows you to multiply your plants without having to purchase more or wait for seeds.
Some common propagation techniques include:
- Taking cuttings – using a cutting from a stem, root, or leaf
- Dividing plants – splitting the roots or stems into multiple new plants
- Air layering – inducing roots to form before severing from the parent plant
- Grafting – joining a stem piece of one plant onto the roots/stem of another
Taking cuttings is usually the easiest approach for home gardeners. It involves cutting off a stem, leaf, or root piece and placing it in soil or water to encourage new root growth. Once established, the new plant is separate from the parent and can be transplanted. Taking cuttings allows you to replicate desirable plants without having to buy new ones.
Reasons To Propagate Plants Yourself
Propagating plants from cuttings allows you to save money compared to buying new plants. Many plants, especially rare or unusual varieties, can be quite expensive to purchase. Taking cuttings from existing plants enables you to multiply these species for free. This lets you grow as many as you want without spending a lot of money. (https://usfblogs.usfca.edu/sustainability/2021/11/17/plant-propagation-techniques-and-benefits/)
Plant propagation is an excellent way to get more specimens of your favorite or most beautiful plants. Rare, exotic, or expensive plants that can only be found at specialty nurseries can be propagated at home. This allows you to create more of these unusual plants. It also creates a backup copy if your original plant dies.
Plants grown from cuttings are often healthier and more vigorous than plants started from seed. This is because the new plants are clones of the parent plant, so they inherit the same strong genetics. Propagated plants also transplant better with less shock because their roots are already established.
Finally, propagating plants from cuttings can simply be an enjoyable hobby. It’s fun to turn a few cuttings into a ton of new plants for free. Watching the new roots form gives a great sense of satisfaction. Propagation lets you feel like a plant scientist conducting your own cloning experiments. (https://www.purdue.edu/hla/sites/yardandgarden/extpub/new-plants-from-cuttings-text-only/)
Materials Needed
To propagate plants from cuttings at home, you’ll need a few essential supplies:
Sharp shears/pruning snips: It’s crucial to make clean cuts when taking cuttings so you don’t damage the plant tissue. Invest in a good pair of sterilized pruning snips designed for propagation. The HTG Supply Razor Sharp Micro-Tip Straight Snip (https://www.htgsupply.com/product-category/cloning-seed-starting/propagation-accessories/) is a great choice.
Rooting hormone: Using a powder or gel rooting hormone like Dip ‘N Grow (https://www.arbico-organics.com/category/propagation-tools-supplies) helps stimulate root growth on cuttings. Look for an organic, non-GMO formula.
Potting mix: Use a lightweight, sterile soilless potting mix like FoxFarm’s Happy Frog Potting Soil which is ideal for starting seeds and cuttings.
Containers: You’ll need small containers like seedling plug trays or pots around 2-3 inches wide to plant each cutting. Make sure there are drainage holes at the bottom.
Choosing Plant Cuttings
When taking cuttings from plants, it’s important to select the right parent plant and cutting material. According to The Spruce, you’ll have the best luck rooting cuttings that are taken from healthy, pest-free parent plants. Select plants that are vigorous, disease-free, and growing well. Avoid taking cuttings from plants that are stressed, diseased, or insect-ridden.
Proper timing is also key for success. For annual and herbaceous plants, The Spruce recommends taking cuttings in spring and early summer when plants are actively growing. For woody shrubs and perennials, take cuttings in late summer or fall after flowering is complete. Avoid taking cuttings during periods of slow growth.
When selecting the cutting material, Homes & Gardens advises choosing the proper type and size of cutting. For herbaceous plants, take 3-6 inch tip cuttings from fresh, new growth. For woody shrubs, take 4-6 inch stem cuttings from pencil-sized pieces of new growth. Always use clean, sharp pruners or scissors to ensure a smooth cut.
Taking Cuttings
One of the most important steps in propagating plants from cuttings is how you actually take the cutting from the mother plant. Follow these tips for the best results:
Cut just below a node or bud on the stem. The node is the part of the stem where leaves emerge, and it is where new roots will generate. Make the cut at an angle about 1/4 inch below the node [1].
Remove any flowers, buds or fruit from the stem. This allows the plant to focus its energy on root production rather than fruit production [2].
Make a clean cut using a sharp, sterile knife or pruners. You can make the cut straight across or on an angle, both work well. Avoid crushing or tearing the stem.
Take cuttings in the morning when the plant is fully hydrated for best results. Place cuttings into water immediately after cutting to avoid drying out.
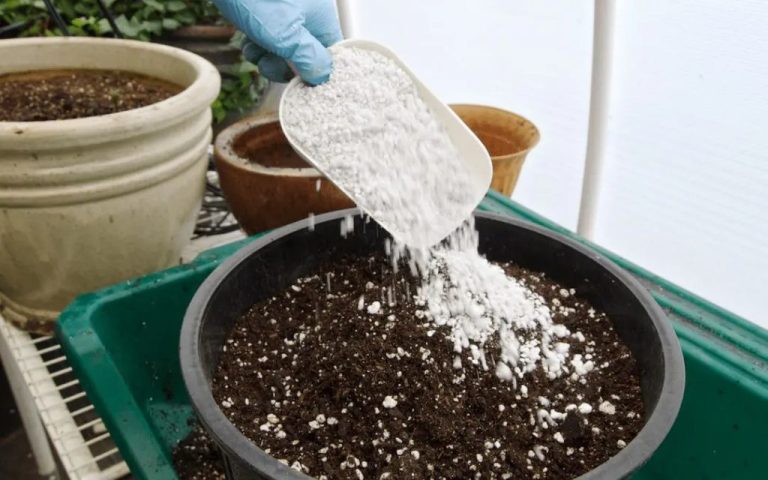
Using Rooting Hormone
One of the key steps for successful propagation of plant cuttings is using rooting hormone. Rooting hormone contains a plant growth hormone called indole-3-butyric acid that promotes root growth. As cited by the Garden Safe product description, this ingredient “promotes the development of roots on most popular home, garden and greenhouse varieties.” Rooting hormone helps cuttings form roots faster and results in a higher success rate versus no hormone.
To use rooting hormone:
- Cut a stem off the parent plant at a 45 degree angle.
- Dip the cut end of the stem in rooting hormone powder or gel, coating the bottom 1-2 inches.
- Gently tap off any excess powder or gel, as too much can damage the cutting.
As described by The Spruce, rooting hormone works on many types of cuttings including woody stems, leaves, roots, and new growth to dramatically increase the chance of successful propagation.
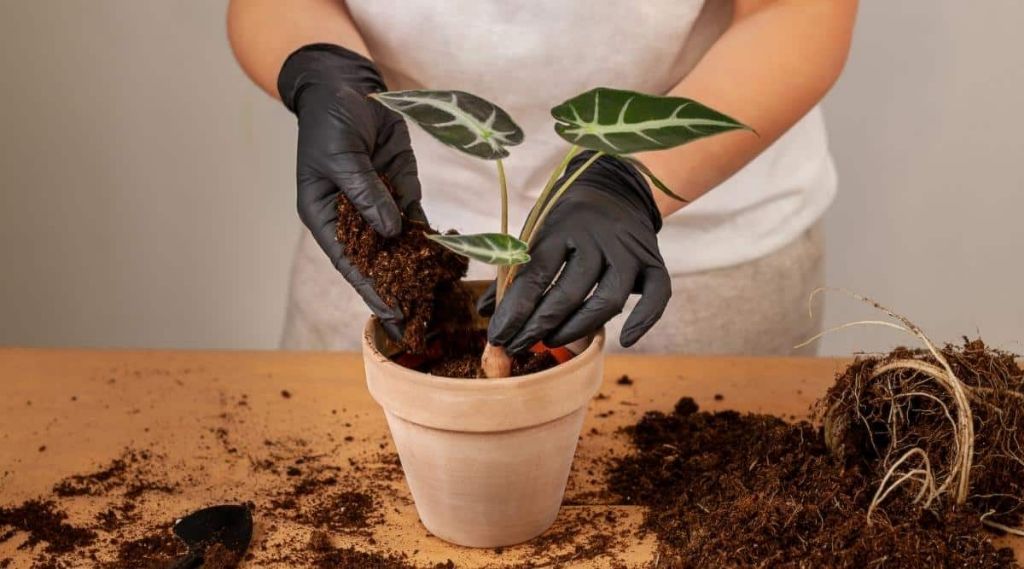
Planting Cuttings
Once you have your cuttings prepped, it’s time to plant them. Start by filling your containers about 2/3 of the way with moistened potting soil. The soil should be damp but not soggy. Using your fingers or a pencil, poke holes deep enough for the cuttings to fit snugly (about 2-3 inches deep). Gently insert each cutting into a hole, making sure the nodes are underground and the leaves are above the soil surface.
When all your cuttings are planted, firm the soil gently around each stem. This ensures good contact between the stem and soil. Stake taller or top-heavy cuttings to help support them. Insert the stake next to the cutting stem and loosely tie the stems to the stake as needed.
Caring for New Cuttings
Proper care of your new cuttings is crucial for helping them grow roots and establish themselves. The main things to focus on are keeping the cuttings moist, providing bright indirect light, allowing ventilation, and gradually transitioning them to full sun.
It’s important to keep the cuttings moist but not soaked. Mist the cuttings daily or place the pots in a humidity tray filled with pebbles and water. Water sparingly, just enough to maintain constant moisture. Allow the potting soil to dry out slightly between waterings.1
Bright indirect light is ideal for new cuttings. An east or west-facing window is often perfect. Direct hot sun will dry and stress the tender new cuttings. Ensure the leaves don’t touch the interior of the bag or container to prevent rotting.2
Good air circulation and ventilation prevents fungal or bacterial diseases. Open any bags or domes for a period each day to refresh the air inside. Use sterilized pots and soils to avoid introducing pathogens.3
Once roots are established, gradually transition the cutting to full sun over a 7-10 day period. This hardens off the plant and gets it ready for transplanting.
Transplanting Successfully
Once your cuttings have developed a strong root system, it’s time to transplant them into soil. However, you can’t just take a plant that’s adapted to water and stick it in the ground. You need to “harden off” and acclimate the plant to prevent transplant shock.
To harden off, place the cuttings outside in partial shade during the day, bringing them back indoors at night. Do this for about a week before transplanting. This allows the plant to gradually get used to the outdoor environment.
Choose the right time to transplant based on your climate. Avoid transplanting during the hottest part of summer or when freezing nights are still common. Early fall or spring are ideal times for most climates.
When transplanting into soil, bury the stem deep so just the leaves are sticking out. Roots will form along the buried stem. Make sure the soil is loose and well-draining. Water thoroughly after transplanting and provide partial shade for a few days as the plant continues to acclimate. With proper hardening off and care, your propagated plants can thrive in their new home.
Source: https://cleverbloom.com/transfer-your-cuttings-to-soil/
Troubleshooting Issues
Propagating plants from cuttings can run into various issues, but the most common problems are related to rotting, mold, weak growth, and legginess. Here are some tips for troubleshooting these problems:
If your cutting starts to rot or develop mold, it’s likely because of excess moisture. Make sure you’re not overwatering or the medium is too wet. Allow the cutting and soil to dry out more between waterings. You can also use a sterile cutting medium like perlite that won’t hold moisture.1
Weak, stunted growth usually indicates the plant is lacking nutrients and energy to establish roots. Using a rooting hormone can help, as can placing the pot in bright indirect light. Slow-release fertilizer mixed into the soil is another option.1
Leggy, sparse growth happens when the plant is struggling to get enough light. Move the pot to a brighter location or use a grow light to provide more intense light exposure. Take care not to overdo full sun though.1
Be patient, as rooting and establishing new plants takes time. Follow best practices and adjust conditions as needed until your cuttings successfully take root and transition to mature plants.