Complete Guide To Caring For Indoor Palm Plants
Palm plants have been growing indoors for centuries, becoming especially popular in Britain and America during the Victorian era. People were enchanted by these exotic tropical plants and would display them prominently in their parlors and greenhouses as a sign of prestige and worldliness 1. The most popular varieties for indoor growing include majesty palms, parlour palms, areca palms, and kentia palms. These palms are prized for their tropical look, graceful fronds, and ability to purify indoor air. Having palm plants indoors provides many benefits such as improving air quality, adding brightness, serving as natural humidifiers, and bringing a sense of the tropics indoors. With proper care, palm plants can thrive for years indoors, adding beauty and life to any space.
Choosing the Right Palm Variety
When selecting an indoor palm plant, there are several factors to consider such as the plant’s eventual size, light requirements, humidity preferences, and growth rate. Choosing the right variety for your environment is key to ensuring the palm thrives in your home.
Some of the best palm varieties for bright, sunny indoor spaces include Parlor Palms, Areca Palms, and Ponytail Palms. These varieties do well with several hours of direct sunlight per day. For lower light areas, top choices are Majesty Palms, Bamboo Palms, and Kentia Palms which can tolerate more shade.
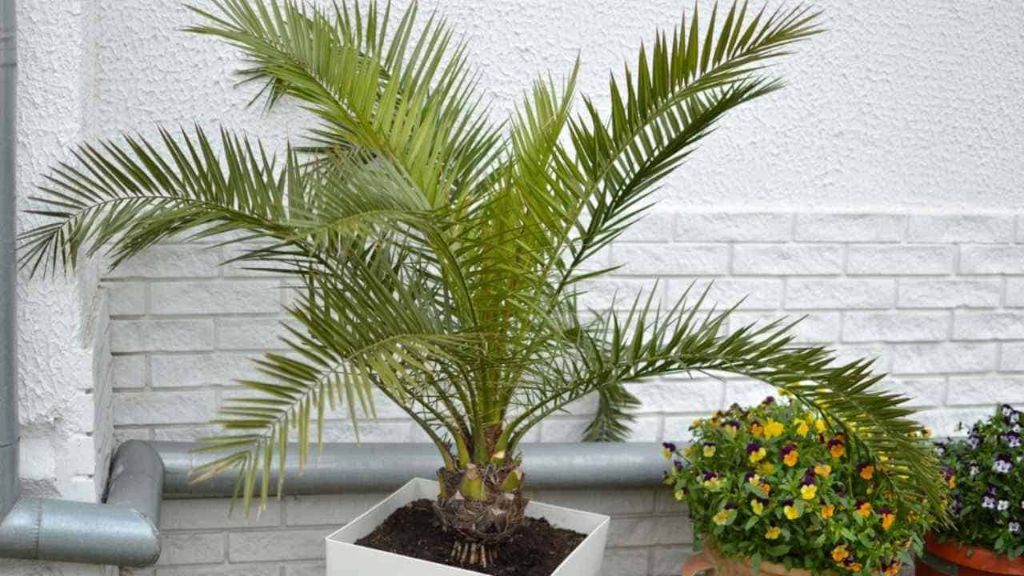
Larger palm varieties like Kentia Palms and Fishtail Palms need abundant space as they can grow up to 10 feet tall indoors. Smaller palms like Parlor Palms and Pygmy Date Palms are ideal for desks and tabletops. Palms like Ponytail Palms and Sago Palms have unique features like ponytail-like trunks or sculptural forms.
When selecting an indoor palm, look for plants with full, green, upright fronds and no brown tips or spots. Avoid plants that are wilting, drooping, or have excessive yellowing as this indicates stress. The soil should be lightly moist but not sopping wet. With healthy plants and proper care, palm trees can thrive indoors for many years.
Providing the Right Potting Mix
The potting mix is crucial for healthy palm plants grown indoors. Using a soilless potting mix specifically formulated for palms provides the drainage and aeration that palm roots need.
A good potting mix for palm plants includes equal parts peat moss or coconut coir, perlite, and potting soil to allow for both moisture retention and drainage (Miracle-Gro). You can create your own palm potting mix by combining 1 part peat moss, 1 part perlite, and 1 part potting soil.
Make sure the pot has drainage holes to allow excess water to flow through the bottom. You can add materials like gravel, pebbles, or broken clay pots at the bottom of the planter to further improve drainage.
Repotting palm plants every 2-3 years provides fresh soil and allows the roots to spread. Be sure to choose a pot only 1-2 inches larger than the previous container to avoid overpotting.
Watering Palm Plants
Proper watering is critical for keeping an indoor palm tree healthy. How often you need to water depends on the specific variety, pot size, season, and other environmental factors.
As a general rule, indoor palm trees prefer consistently moist, but not saturated soil. The top inch or two of soil should be allowed to dry out between waterings. You can check this by sticking your finger into the soil.
During the active growing season (spring and summer), most varieties need watering about once a week. In winter when growth slows, you can often go 10-14 days between waterings. Always check the soil first before watering on a schedule.
Underwatering is the most common cause of problems. If the soil dries out too much, you may see browning leaf tips and fronds. Overwatering can lead to root rot. You’ll notice wilting, discolored fronds, and excessive leaf drop if the soil stays too wet.
Palms take up moisture through their roots only. Mist the fronds, but avoid getting water directly in the crown of the palm as this can promote rot. Water until it drains freely from the drainage holes at the bottom of the pot. Allow excess water to drain fully before returning the palm to its saucer.
For best results, water palm trees early in the day. This allows the foliage time to dry out before night, reducing the risk of fungus and bacteria.
During winter when growth has slowed, reduce watering frequency and avoid keeping palms in standing water or saturated soil for extended periods.
With proper irrigation matched to variety, season, and environment, you can maintain lush, healthy palms indoors.
Humidity and Misting
Palm plants thrive in humid conditions, preferring 40-50% humidity according to experts (source). The dry air in most homes during winter can cause leaf tips to turn brown. Using humidifiers in the room with your palm plants can help increase moisture levels. Aim to keep humidity around 50% for optimal health.
Misting the leaves every few days is another easy way to provide a moisture boost. Focus on misting the undersides of leaves, as this is where the small pores (stomata) are located that allow the plant to take in water. Avoid misting so heavily that water pools in the crown where new leaves emerge, as this can encourage fungal growth.
To prevent fungal issues like leaf spot, make sure to allow the plant foliage to fully dry after misting or watering before night falls. Improve air circulation by using fans or opening windows on days with lower humidity. With proper humidity and air flow, palm plants can thrive indoors.
Sunlight Requirements
When it comes to sunlight, most indoor palm varieties thrive in bright, indirect light. Direct sun can scorch and dry out their foliage. Here are some key factors to consider for lighting palm plants:
Certain palms like parlor palms and kentia palms prefer medium to bright indirect light. Keep them 3-5 feet away from a sunny window. More intense light lovers like date palms, majesty palms and areca palms can be placed closer to an east or west window.
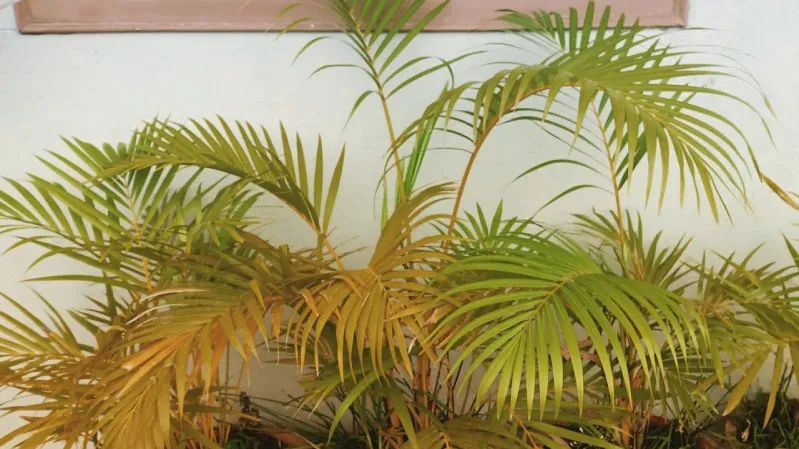
Signs a palm isn’t getting enough light include yellowing or drooping leaves and stunted new growth. Maximizing light exposure by regularly rotating the plant or moving it to follow the changing path of sunlight throughout the seasons can help.
Filtered light through a sheer curtain or placing palms near, but not directly in, a southern window are good ways to provide bright indirect light. Using reflective surfaces like mirrors or white walls to bounce more sunlight toward palms can also be beneficial.
Outdoors during summer, palms can acclimate to some direct morning or late afternoon sun. But leave indoor varieties in shade if placing them outside.
Fertilization
Proper fertilization is important for indoor palms to thrive. Use a palm fertilizer that contains micronutrients like iron, manganese and magnesium. A balanced slow-release fertilizer with an NPK ratio around 12-4-12 is recommended.
During the growing season, fertilize palm plants every 2-3 months according to label instructions. Dilute any liquid fertilizer to half strength before application. In winter, reduce fertilizer applications. Over-fertilizing can burn palms.
Look for signs of nutrient deficiencies like yellowing fronds (nitrogen deficiency), brown leaf tips (potassium deficiency) or stunted new growth (magnesium deficiency). If you notice any deficiencies, apply a fertilizer specifically formulated for palms.
Outdoors, palm trees tend to get sufficient nutrients. But container grown indoor palms depend on regular fertilizer applications from the grower for optimal health.
Pruning Palm Fronds
Palm fronds should be pruned when they are completely brown or yellow. This indicates the fronds are dead and will not provide any more nutrients to the plant. Fronds should be pruned close to the trunk, taking care not to damage the growth bud at the base of each frond.
In general, palm fronds should be pruned once per year, typically in late winter or early spring before new growth emerges. For indoor palms, aim to remove no more than 15% of the overall frond mass at one time to avoid shocking the plant.
When pruning fronds, sterilize pruning shears with isopropyl alcohol first to avoid spreading disease. Use a sharp bypass pruner and make each cut at a 45 degree angle, right above the trunk tissue. Avoid leaving any stubs behind. Gently pull down on the dead frond while making the cut to avoid tearing the trunk tissue.
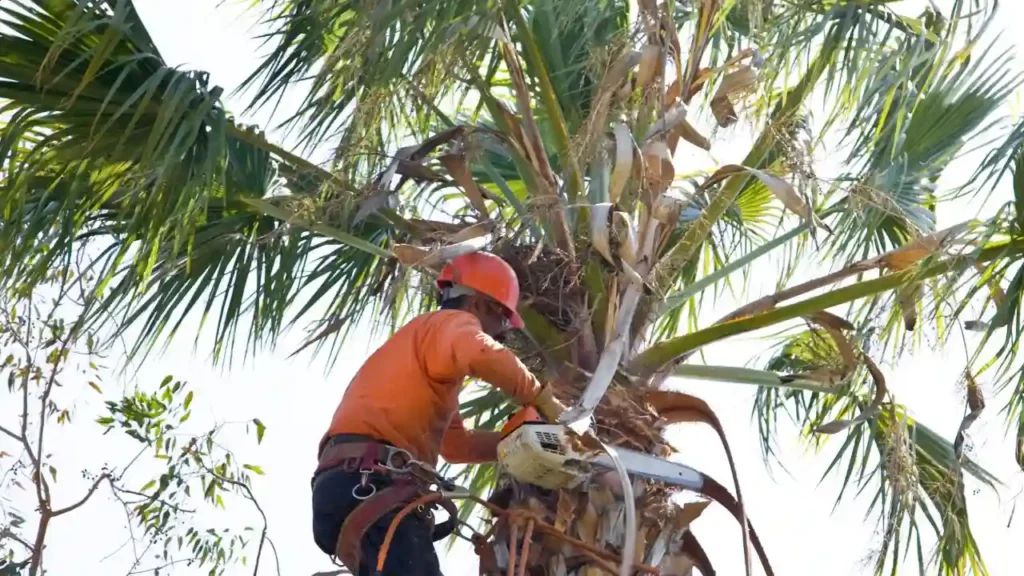
Cutting back all fronds at once or pruning too severely can damage the plant. Instead, focus on removing fully dead or declining fronds. Leave at least 3-5 healthy fronds for the plant to continue photosynthesizing. Never cut into green, living frond tissue as this will cause permanent damage.
With proper technique, pruning palm fronds helps the plant use its energy more efficiently, maintaining a full, healthy appearance. Just be sure not to overdo it or prune too deeply into the crownshaft.
Source: https://www.thespruce.com/grow-indoor-palm-trees-1902902
Repotting Palm Plants
Repotting your palm into a larger container is an important part of keeping it healthy and helping it grow. The best time to repot is during the spring or early summer when the plant is actively growing. Avoid repotting during the winter months. Signs that your palm needs repotting include roots growing out of the drainage holes or the plant becoming top heavy and unstable in the pot.
Follow these steps for repotting your palm:
- Choose a new container that is 2-4 inches larger than the current pot. Make sure it has drainage holes in the bottom.
- Fill the new pot about 1/3 full with a well-draining potting mix formulated for palms. Some options are cactus/citrus mix or coconut coir-based mix.
- Gently remove the palm from its old container and loosen any circled roots with your fingers or a knife. Prune off any dead or damaged roots.
- Place the palm in the new pot and fill around it with more fresh potting mix, firming it down with your hands as you go to remove air pockets.
- Leave about 1 inch of space between the top of the soil and the rim of the pot.
- Water thoroughly until it drips from the drainage holes. Allow excess water to drain fully.
- Place the newly repotted palm in partial sun for a few weeks to help it recover from any transplant shock.
Palms will typically only need repotting every 2-3 years. Monitor your plant’s growth and repot as needed when the roots have filled the container.[1][2]
Common Pests and Diseases
Palm plants can be susceptible to several common pests and diseases. Properly identifying and treating issues early is key to maintaining a healthy plant.
Spider Mites
Spider mites are a common pest that feed on cells on the undersides of leaves, causing yellow or brown spots 1. Webbing may also be visible. To treat, spray the plant thoroughly with water or insecticidal soap every 5-7 days until the mites are gone.
Mealybugs
Mealybugs are small, soft-bodied insects that can infest the leaves and stems. They secrete a sticky substance that can lead to sooty mold. Use a cotton swab dipped in alcohol to spot treat mealybugs. Systemic insecticides can also help eliminate an infestation.
Root Rot
Overwatering is the main cause of deadly root rot in palms. Only water when the top inch of soil is dry, allow good drainage, and avoid moisture on the leaves. If rot is present, repot in fresh soil and discard diseased roots. Allow the plant to dry out between waterings.
Using integrated pest management with proper cultural practices, inspection, and targeted treatments can keep palm plants healthy and pest-free.