Planting Guide For Spring: What To Plant And When
This guide aims to provide helpful tips and recommendations for planting a successful spring garden. With winter coming to an end, spring is the perfect time to get outdoors and start growing your own fresh fruits, vegetables, and flowers. In the following sections, readers will learn key information like determining your USDA Hardiness Zone, when to start seeds indoors, how to prepare soil for planting, spring crop suggestions, common mistakes to avoid, and more. Whether you’re a beginner looking to start your first garden or a seasoned gardener, this guide will cover everything you need to know to plan and plant a thriving spring garden.
The introduction briefly introduces the purpose of the guide, which is to provide tips and recommendations for planning and planting a spring garden. It sets expectations for the topics that will be covered, like USDA Hardiness Zones, starting seeds, preparing soil, avoiding mistakes, etc. The overall goal is to help readers plan and plant a successful spring garden.
Determine Your USDA Hardiness Zone
The USDA Plant Hardiness Zone Map divides North America into 13 hardiness zones based on average annual minimum winter temperatures. Each zone is 10°F warmer (or colder) in an average winter than the adjacent zone. For example, Zone 5 ranges from -20°F to -10°F and Zone 6 ranges from -10°F to 0°F. Knowing your hardiness zone is crucial for determining which plants can survive the winter in your area.
You can find your hardiness zone by entering your zip code on the USDA Plant Hardiness Zone Map website. The site will show the zone for your location. Hardiness zone maps are also available through many university extension services and in gardening books.
It’s important to note that your local microclimate may differ from the zone on the map. Areas shaded by trees or with lots of reflected heat from surfaces like concrete may be warmer. And areas on hillsides or that get more wind may be colder. So you may need to adjust your zone by one level.
When to Start Plants Indoors
The timing for starting seeds indoors depends on the hardiness zone you live in. Refer to the USDA Plant Hardiness Zone Map to determine your zone. Generally, you should start warm weather crops like tomatoes, peppers and eggplants 6-8 weeks before the last expected spring frost. Cool weather crops like lettuce, spinach and broccoli can be started 4-6 weeks before the last frost. Check seed packets for specific recommendations on start times. For example, in zone 6, start tomatoes and peppers indoors in mid-March, while lettuce and spinach can wait until April How and When to Start Seeds Indoors – The Old Farmer’s Almanac.
The key is to time it so plants are not too mature when it’s time to transplant them outside. Mature transplants often suffer more transplant shock. Use this planting calendar as a guide for common spring crops:
Zone 5 & 6 – Start tomatoes and peppers in March. Lettuce, spinach and other greens in April.
Zone 7 & 8 – Start tomatoes in late February. Peppers in March. Lettuce and spinach in March.
Zone 9 & 10 – Start tomatoes and peppers in mid to late February. Lettuce and spinach in February/March.
Herbs like basil can be started about 4 weeks before your last expected spring frost How to Start Seeds Indoors – Swanson’s Nursery.
This covers key recommendations on when to start different spring plant varieties indoors based on planting zone, with a calendar guide and links to additional resources. Let me know if you would like me to expand or modify anything.
Prepare Soil for Planting
Properly preparing your soil before planting is one of the most important steps for a successful spring garden. Good soil preparation helps provide nutrients for plants to thrive and allows their roots to establish easily. According to Dammann’s Garden Company, the top 6-12 inches of soil is where most plant roots grow and uptake nutrients, so this zone should be loosened and enriched.
Start by clearing any existing weeds, rocks or debris from your planting areas. Then loosen and break up compacted soil using a spading fork or tiller so plant roots can penetrate easily. If your soil is heavy clay, add compost or other organic matter like aged manure, leaf mold or peat moss to improve drainage and moisture retention. For sandy soils, mix in organic matter to increase its water holding capacity. According to Proven Winners, the ideal soil composition is approximately 60% mineral elements (sand, silt and clay) and 40% organic matter.
A soil test can help determine your soil pH and if any amendments are needed like lime to raise pH or sulfur to lower it. Most plants grow best with a pH between 6.0-7.0. Fertilizer with a balance of nitrogen, phosphorus and potassium is usually recommended when prepping soil to provide nutrition for establishing plants. Once your soil is prepared, avoid walking on planting beds to prevent re-compaction.
Selecting Transplants
When purchasing or growing transplants, there are a few things to look for to ensure you select healthy specimens that will thrive once planted in your garden. Here are some tips for choosing robust transplants:
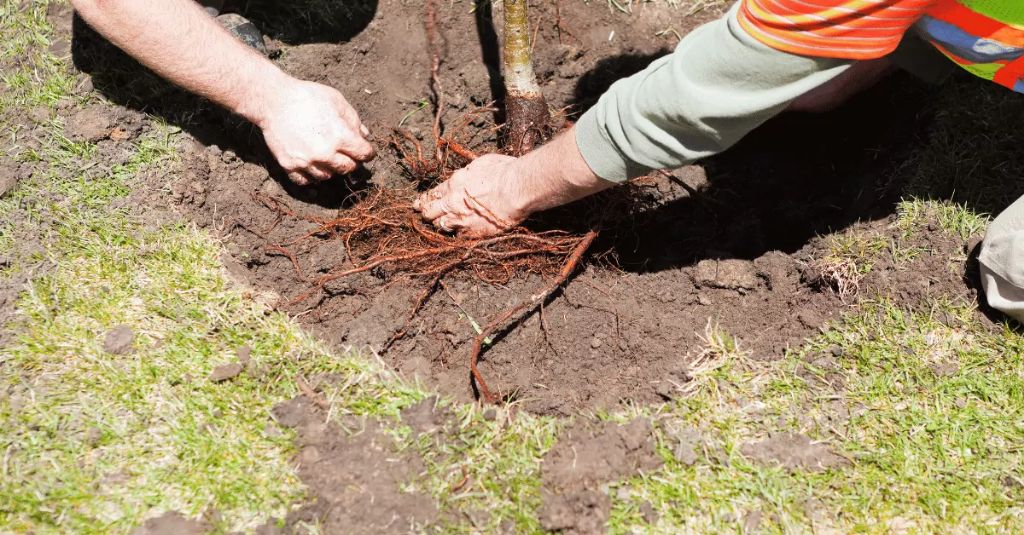
Check the roots – Carefully remove the plant from its container and inspect the root system. Look for white roots that are free of kinks or circles. Avoid root-bound plants whose roots are densely packed or growing in circles around the outside of the root ball.
Look for vigorous foliage – Select transplants with leaves that are green, plump and firm, not yellow, wilted or budded. This indicates the plant is actively growing. Also avoid plants with signs of pests, diseases or damage.
Examine the stem – The stem should be sturdy and strong, not long and leggy or thin and weak. A thick stem supports better growth.
Ready for planting – Choose plants that are appropriate for the current outdoor conditions, not too small or large. Optimal transplant size depends on the particular plant variety.
Hardening off – Before planting, “harden off” transplants by slowly introducing them to outdoor conditions over 7-10 days. Bring plants outside for a few hours per day, gradually increasing time outside. This helps them adapt and avoid transplant shock.
Direct Sowing vs. Transplants
When starting plants for your spring garden, you have two options – direct sowing seeds into the garden bed or starting seeds indoors and transplanting the seedlings. Both methods have pros and cons to consider.
Direct sowing is when you plant seeds directly into the garden bed where you want them to grow. Some benefits of direct sowing include:
- Less work since you skip starting seeds indoors and hardening off seedlings.
- Don’t have to worry about transplant shock.
- Roots establish naturally without being disturbed.
However, direct sowing does have some downsides such as:
- Seeds are exposed to changing weather and pests.
- Germination rates may be lower.
- Hard to keep track of what was planted where.
Good candidates for direct sowing include radishes, peas, lettuce, beets, carrots, spinach, beans, and cucumbers (source).
Transplants involve starting seeds indoors 4-6 weeks before your last expected frost date and then moving the seedlings to the garden. Advantages of using transplants are:
- Earlier harvest since plants get a head start indoors.
- Higher germination rates in a controlled environment.
- Easier to keep track of varieties.
Some downsides to transplants include:
- More time and work involved.
- Risk of transplant shock.
- Seedlings may be spindly and leggy.
Good choices for starting indoors and transplanting are tomatoes, peppers, eggplants, broccoli, cabbage, cauliflower, and Brussels sprouts.
In summary, direct sow quick-growing crops like lettuce and radishes. Use transplants for cold-sensitive plants like tomatoes to give them a head start. Consider your time, space, and needs when deciding between direct sowing and transplants.
Spring Planting Calendar
When to plant your spring garden depends on your USDA Hardiness Zone. The last expected frost date can vary greatly across different zones and locations. To get started, check your USDA Hardiness Zone to determine your average last frost date.
Next, consult planting calendars tailored to your zone and region. For example, the Planting Calendar for Rochester, NY provides dates for sowing seeds indoors and transplanting seedlings outdoors based on the average last frost date of May 5th. The North Texas Planting Calendar gives specific planting dates for crops like spinach, carrots, tomatoes, and more based on the last frost date of March 15th.
General spring planting guidelines based on zone:
- Zones 3-4: Begin starting cool-weather crops like peas, spinach and lettuce indoors 6-8 weeks before your last frost. Transplant seedlings outdoors 2-3 weeks before last frost.
- Zones 5-6: Start seedlings for crops like broccoli, cabbage and cauliflower indoors 4-6 weeks before your last frost date. Move them outside 1-2 weeks before the last expected frost.
- Zones 7-8: Plant warm weather vegetables like tomatoes, peppers and beans 1-2 weeks after your average final frost date.
Consult planting calendars tailored to your specific area for the most accurate planting dates for your zone and region.
Caring for Seedlings
Once your seeds have germinated, proper care is crucial to help your seedlings thrive. Here are some tips for caring for your new seedlings:
Water seedlings regularly, taking care not to overwater them. Allow the soil surface to dry out slightly between waterings. Use a spray bottle or watering can with a fine rose attachment to gently water without disturbing delicate roots. If seedlings start to wilt or droop, they likely need more water.
Start fertilizing seedlings once the first true leaves appear. Use a water-soluble fertilizer diluted to half-strength. Fertilize every 7-10 days to provide nutrients for growth. Too much fertilizer can burn young seedling roots.
Ensure seedlings receive adequate sunlight and warmth. Place them in a sunny, south-facing window or under grow lights. Maintain temperatures of 65-75°F for optimal growth. Lower temperatures can stunt plants.
Protect seedlings from pests like fungus gnats or mites, which can damage young plants. Allow the soil surface to dry between waterings to deter fungus gnats. Remove any infected plants immediately to prevent spreading. Apply insecticidal soap if pests become problematic.
Gradually harden off seedlings about 1-2 weeks before transplanting them outside. Slowly introduce them to outdoor conditions by setting them outside for a few hours each day. This transition toughens them up and prevents transplant shock.
Gently handling seedlings and providing the right care ensures they grow into strong, healthy plants ready for the garden. Monitor new plantings daily and make adjustments to their care as needed.
Avoiding Common Mistakes
Discuss most frequent mistakes gardeners make in spring and how to avoid them.
Some of the most common mistakes when planting in spring include:
- Planting too early – Many gardeners get overeager and plant summer crops like tomatoes, peppers, and squash too early when cold temperatures can still return. Wait until night temperatures are reliably above 50 degrees Fahrenheit.
- Forgetting to harden off seedlings – Seedlings started indoors need to be hardened off for 7-10 days before transplanting. This means setting them outdoors gradually to adjust to sun, wind, and temperature changes.
- Planting in soil that is too wet – Working soil that is excessively wet can damage soil structure. Wait until soil is dry enough to crumble in your hand before tilling or planting.
- Allowing weeds to grow – Stay on top of weeding beds and avoid letting weeds take over garden spaces. Weeds compete for nutrients, water, and space.
- Crowding plants – Follow spacing guidelines on seed packets or plant tags. Overcrowding leads to disease, stunted growth, and reduced yields.
- Forgetting to thin – When direct sowing, remember to thin seedlings to proper spacing. Pinch or snip off weaker looking plants.
Pay close attention to planting dates, soil conditions, and growing requirements to avoid common spring planting pitfalls. Patience is key – resist the temptation to plant too much too soon. Your garden will reap the rewards.[1][2]
Conclusion
As spring arrives and the weather begins to warm up, it’s prime time to get outside and start planting your vegetable garden. This guide has provided key information on determining your planting zone, choosing the right plants to sow and transplant, and techniques to help your garden thrive. The spring planting calendar gives an ideal schedule for when to get different crops in the ground so you can enjoy a bountiful harvest. Proper soil preparation, avoiding common mistakes, and caring for seedlings will set your garden up for success.
With the tips in this guide, you’re equipped with the knowledge you need to plant a variety of delicious fruits, vegetables, and herbs this spring. The satisfaction of nurturing plants from seed to harvest is a rewarding experience. Put these recommendations into practice in your own garden, and you’ll be amazed by the fresh flavors you can grow yourself. Wishing you a season of productive gardening and memorable meals made with ingredients straight from your backyard.